Did you know that you could decorate onto wood without any expensive equipment?
All you need is a laser printer, RST 9.1 transfer media and some glue.
Step 1 : Create your design
Using your favourite design software, create your masterpiece. If you are looking for a simple to use web-based design software, you can try out canva
Step 2 : Print out your design onto RST 9.1 using a colour laser printer
Remember to mirror image your design before printing. Be sure to select the correct paper type for your printer if you are unsure which is the correct paper type, refer to our guide here.
Step 3 : Apply the glue
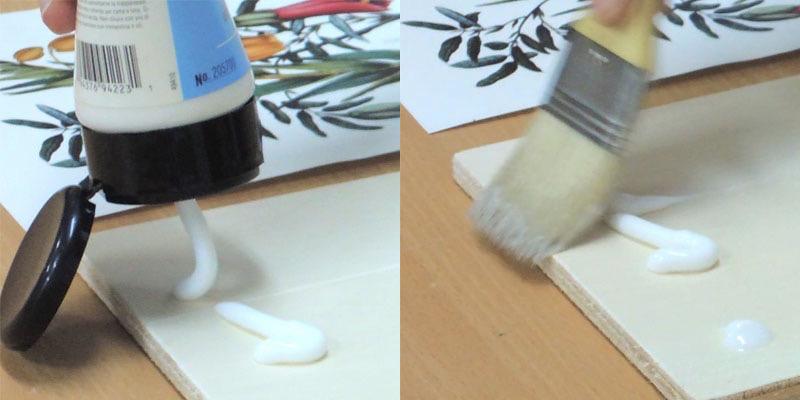
Using a brush, apply a layer of glue onto the wood surface. For our demo, we used liquidtex gloss gel medium. We have so far found this to work the best. The gel is white when wet but becomes transparent when it is totally dry. You can also use acrylic paint as a cheaper alternative.
Step 4 : Apply the transfer
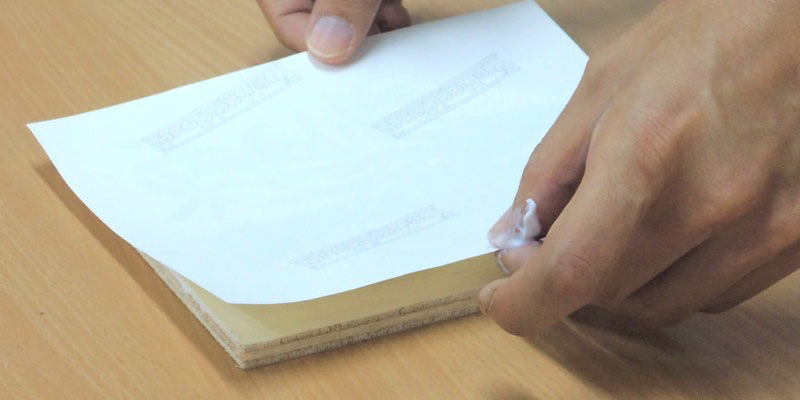
Apply the RST media printed side face down onto the wood surface. Using a vinyl applicator or something similar, ensure that the RST media is firmly pressed against the surface of the wood. It is ok if the glue seeps out from the side.
Step 5 : Let it dry
Allow the transfer to dry for about an hour. The longer you wait the better. If you need the process to be faster you can use a hairdryer or a heat gun to make the glue dry faster. Alternatively, you can also leave it under a heat press.
Step 6 : Remove the transfer
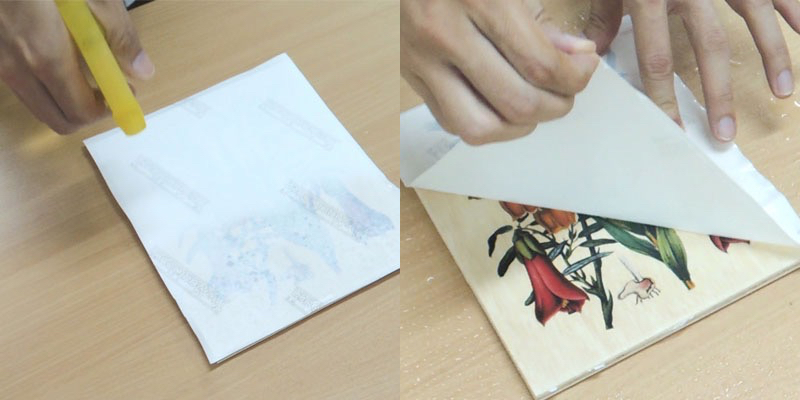
To remove the transfer, spray water onto the RST media until it is totally soaked through. After that, you should be able to just peel off the transfer. Then just dry the wood with a piece of cloth. If you have any excess glue that had seap out by the side, just use a penknife to cut it away.
Product Links
Video Demo
